
In this part we show how to deal with obfuscated Windows API calls in Ngioweb malware using Labeless and x64dbg without reconstructing API-resolving algorithm. If you’re new to all this Labeless stuff, though, please refer to the previous articles in this series as they will be helpful in explaining what’s going on here.
- Introduction
- Installation
- How to Dump and Auto-Resolve WinAPI Calls in LockPos Point-of-Sale Malware
- Scripting theory
- How to decrypt strings in Boleto banking malware without reconstructing decryption algorithm
Ngioweb Proxy malware is closely related to Ramnit. It is distributed in the latest Ramnit campaign as an additional payload downloaded from the Ramnit C&C server. Ngioweb represents a multifunctional proxy server which uses its own binary protocol with two layers of encryption and supports back-connect mode, relay mode, IPv4, IPv6 protocols, TCP and UDP transports.
Resolving Functions By Their Hashes With Labeless
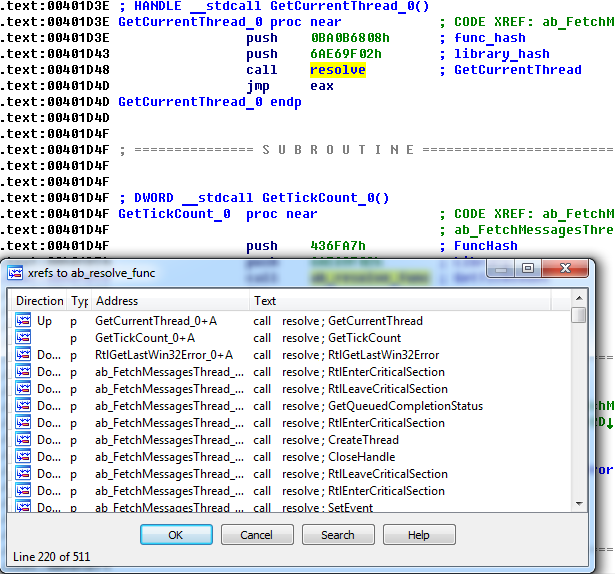
The Ngioweb malware uses several obfuscation methods – API calls obfuscation being one of them. Each time the malware needs to call an API function, it first resolves the address of a target function using a pair of hashes and then calls API function itself using the resolved address:
Figure 1: Ngioweb malware API calls obfuscation.
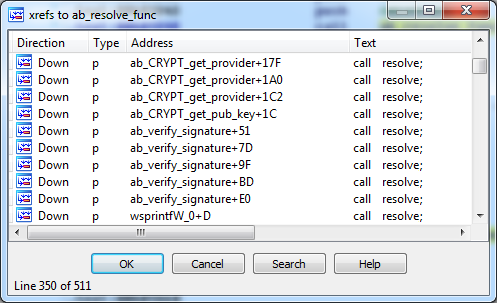
Most calls look like the example above though sometimes we can meet calls with minor differences, but the main idea is the same: two pushes of function hash and library hash are followed by the call of the procedure which resolves an address of API function. Then API function is called using the resolved address. We can find a lot of calls to the resolver function:
Figure 2: References to API resolver procedure.
This greatly complicates the analysis process for the unprepared novice. On the one hand, we can reverse the algorithm of the resolver function, collect names of all Windows API functions and create IDA script which will statically resolve all of them. On the other hand, it could take a lot of time. Labeless allows us to get the same result without any redundant actions by utilizing the resolver function from the malware code.
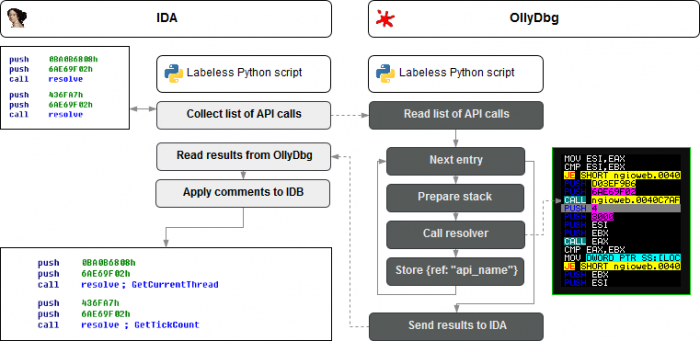
The approach we are going to show doesn’t depend on a particular algorithm because it allows to resolve function names using the code from the malware. It works in the following manner:
Figure 3: Resolving obfuscated API calls using Labeless.
Therefore, to fill the IDB database with names of API functions it is necessary to:
- Execute Labeless script in IDA to collect all references to API resolver procedure in the malware code and prepare the list which should include addresses of prepending pushes of arguments (function hash and library hash).
- Execute Labeless script in OllyDbg or x64dbg to resolve the address of an API function for each obfuscated call, ask debugger for the name of function. The address of an API function is resolved using a call to the malware’s resolver procedure.
- Execute a script in IDA to propagate the names of resolved API functions as comments near the corresponding calls in the IDA database.
To accomplish the first part, the following steps should be taken:
- The address of the API resolver routine is located;
- references to this routine are found;
- The addresses of two pushes with arguments for the function are found;
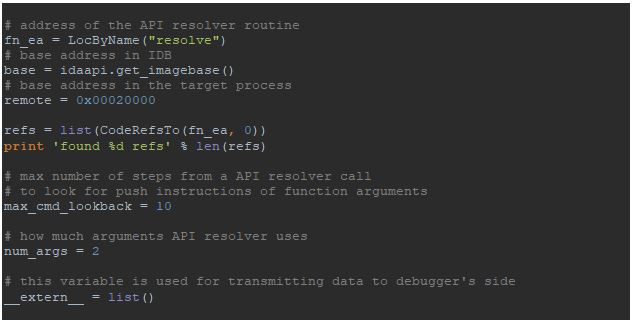
The address of the API resolver routine could be easily acquired by setting the breakpoint to any API functions in a debugger. We have to save the address of the API resolver routine for it will be used in our script.
It is also important to emphasize that the image base address in IDA database could differ from the base address where code is mapped in the target process. This should be taken into account when we collect references to the API resolver function and addresses of prepending pushes with arguments.
References to the API resolver routine could be found using idautils.CodeRefsTo function.
Now we are ready to start writing the code.
We’ve defined some more parameters that may be useful for tuning the script or using for another sample. The first parameter max_cmd_lookback determines how many instructions we should look into while searching “push” instructions. The problem is that there are a lot of calls where “push” instructions are not followed by the call of API resolver routine, or there is some command between pushes:
Figure 4: Non-trivial call of the API resolver routine.
Another parameter (num_args) might be useful if the routine used a different number of arguments.
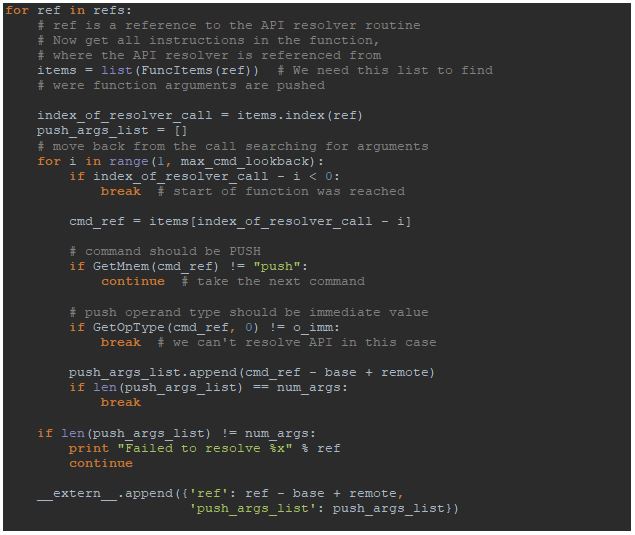
Next we should iterate through all the found references to the resolver routine and collect addresses where “push” instructions with the function arguments are invoked. We use GetMnem function to find “push” instructions. Also we need to check if the operand type of “push” instruction is of immediate value, but not a register. For this purpose GetOpType function is used.
The script covers the most basic cases. However, after executing the script we can see the following messages in the console window:
Failed to resolve 00403f56
This is because there are some more difficult cases like that:
Figure 5: Non-trivial call of the API resolver routine.
Obviously, the script could be extended to handle such cases, but as we are showing only basic concepts, we are not going to complicate the script. If there are only few such cases, they could be resolved manually.
As we can see in the code, the variable __extern__ is used to store all collected data. This variable is used to send the data to the Labeless part which is running in the debugger.
Step 2: Debugger Side
We used x32dbg (32-bit version of x64dbg) to debug this malware, so the script we are going to create will utilize x64dbg Python wrapper API.
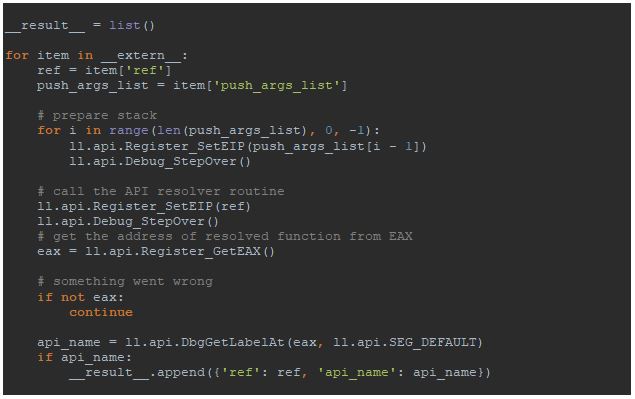
For the script running at the debugger side, the data collected at the first step is available through the __extern__ variable. For each entry in the __extern__ list the script should make a debugger to step over each collected push and call instructions in the correct sequence.
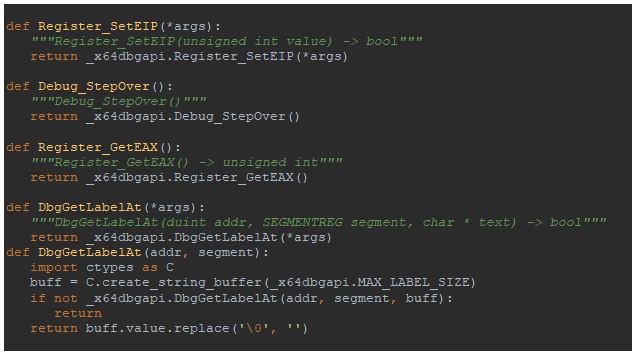
In our script we have to use functions from x64dbg API that will allow us to:
- Set EIP value – Register_SetEIP
- Step over an instruction – Debug_StepOver
- Get EAX – Register_GetEAX
- Get function name from the comment – DbgGetLabelAt
Required function prototypes could be found here:
https://github.com/a1ext/labeless/blob/master/deploy/labeless/backend/x64dbg/x64dbgapi.py
Complete code of the script follows:
The following picture describes in detail how it works:
Figure 6: How code from a debugged malware is executed by the Labeless script.
The last thing we should pay attention to is how to transmit the data back to IDA from a script at the debugger side. For this purpose the variable __result__ should be used. After executing the script this variable is serialized and automatically transmitted to IDA, so it can be used at the next step.
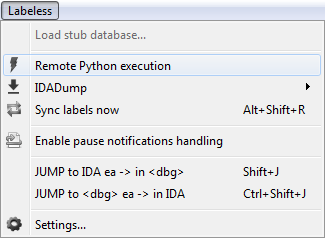
To execute the scripts we have to choose “Remote Python execution” menu item of the Labeless plugin in IDA:
Figure 7: Labeless menu.
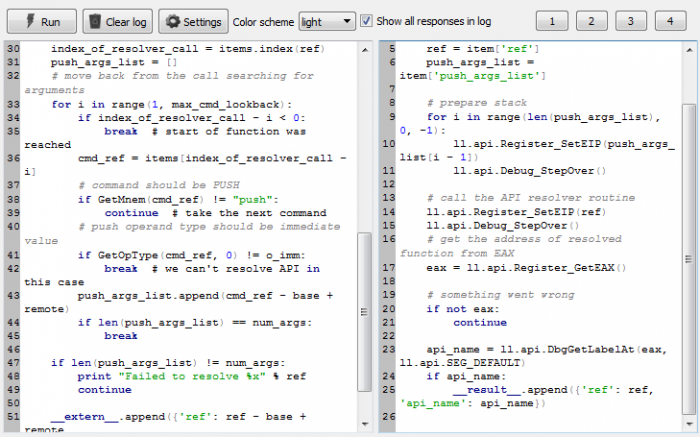
IDA script should be placed at the left pane of the just opened window, debugger side script – at the right pane as shown on the picture.
Figure 8: Labeless Remote Python execution window in IDA.
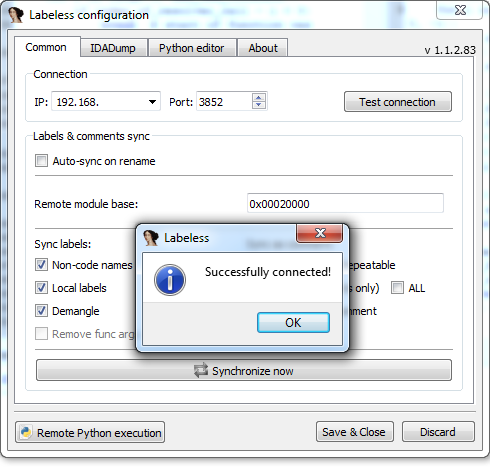
Now, let’s check the connection between debugger and IDA. To do that we need to click “Settings” button and then choose “Test connection” in the opened window:
Figure 9: Labeless Remote Python execution window in IDA.
Then we have to click “Run” button in the Labeless Remote Python execution window to execute scripts.
Step 3: IDA Side
Finally, we should propagate the collected data to the IDB. This is the easiest part. First, we need to clear both left and right Remote Python execution panes. Then put the following easy script to the left pane:
As we can see, the script just iterates though the __result__ variable and sets comments. After executing the script by pressing “Run” button in the Remote Python execution window, we can see the final result:
Figure 10: Propagated comments in IDA.
Therefore, within a few minutes we have made the reverse engineering process of this malware much easier and we can now analyze it like it was almost not obfuscated at all.
IOCs:
MD5: 00dcab7d87c753cd057934fabf391254
SHA256: e5f228d9d38e3d0ebaf0c89a83f589dffce2a2535b5e3aabe70cae3b60e53b5f
Scripts:
- ngioweb – step1 – [ida] resolve obfuscated API calls.py
https://gist.github.com/a1ext/e7e0188011165dcd82c95e1f6621a2d4 - ngioweb – step2 – [x32dbg] resolve obfuscated API calls.py
https://gist.github.com/a1ext/f0d0b779228e553720144e823789fa5c - ngioweb – step3 – [ida] resolve obfuscated API calls.py
https://gist.github.com/a1ext/8797996cae569fb4ad658492d3b5d5e9
Labeless GitHub repository:
https://github.com/a1ext/labeless
Latest Labeless release version:
https://github.com/a1ext/labeless/releases/latest
Alexander Trafimchuk (a1ex.t) – author of Labeless and an all-round jolly good fellow.

